
Product tour
From admission to reimbursement, one step at a time.
Here is exactly what the system does, in the order your clinic does it. Follow a single confinement — one patient, one month of dialysis — from the moment they’re admitted to the day PhilHealth pays and your doctors are settled. Each step shows what your staff do, what the system does for them, and what comes out.
-
1
One-time setup
Set up your clinic
Before any daily work, you load the things that rarely change — once.
- You do
Enter your doctors, treatment packages, products and price lists, PhilHealth SOA rates, and a login for each staff member.
- The system
Stores them as reusable master data and, from then on, applies your prices and loads your default charge items automatically.
- You get
A system that already knows your packages, prices and forms — so daily work is just a few clicks.
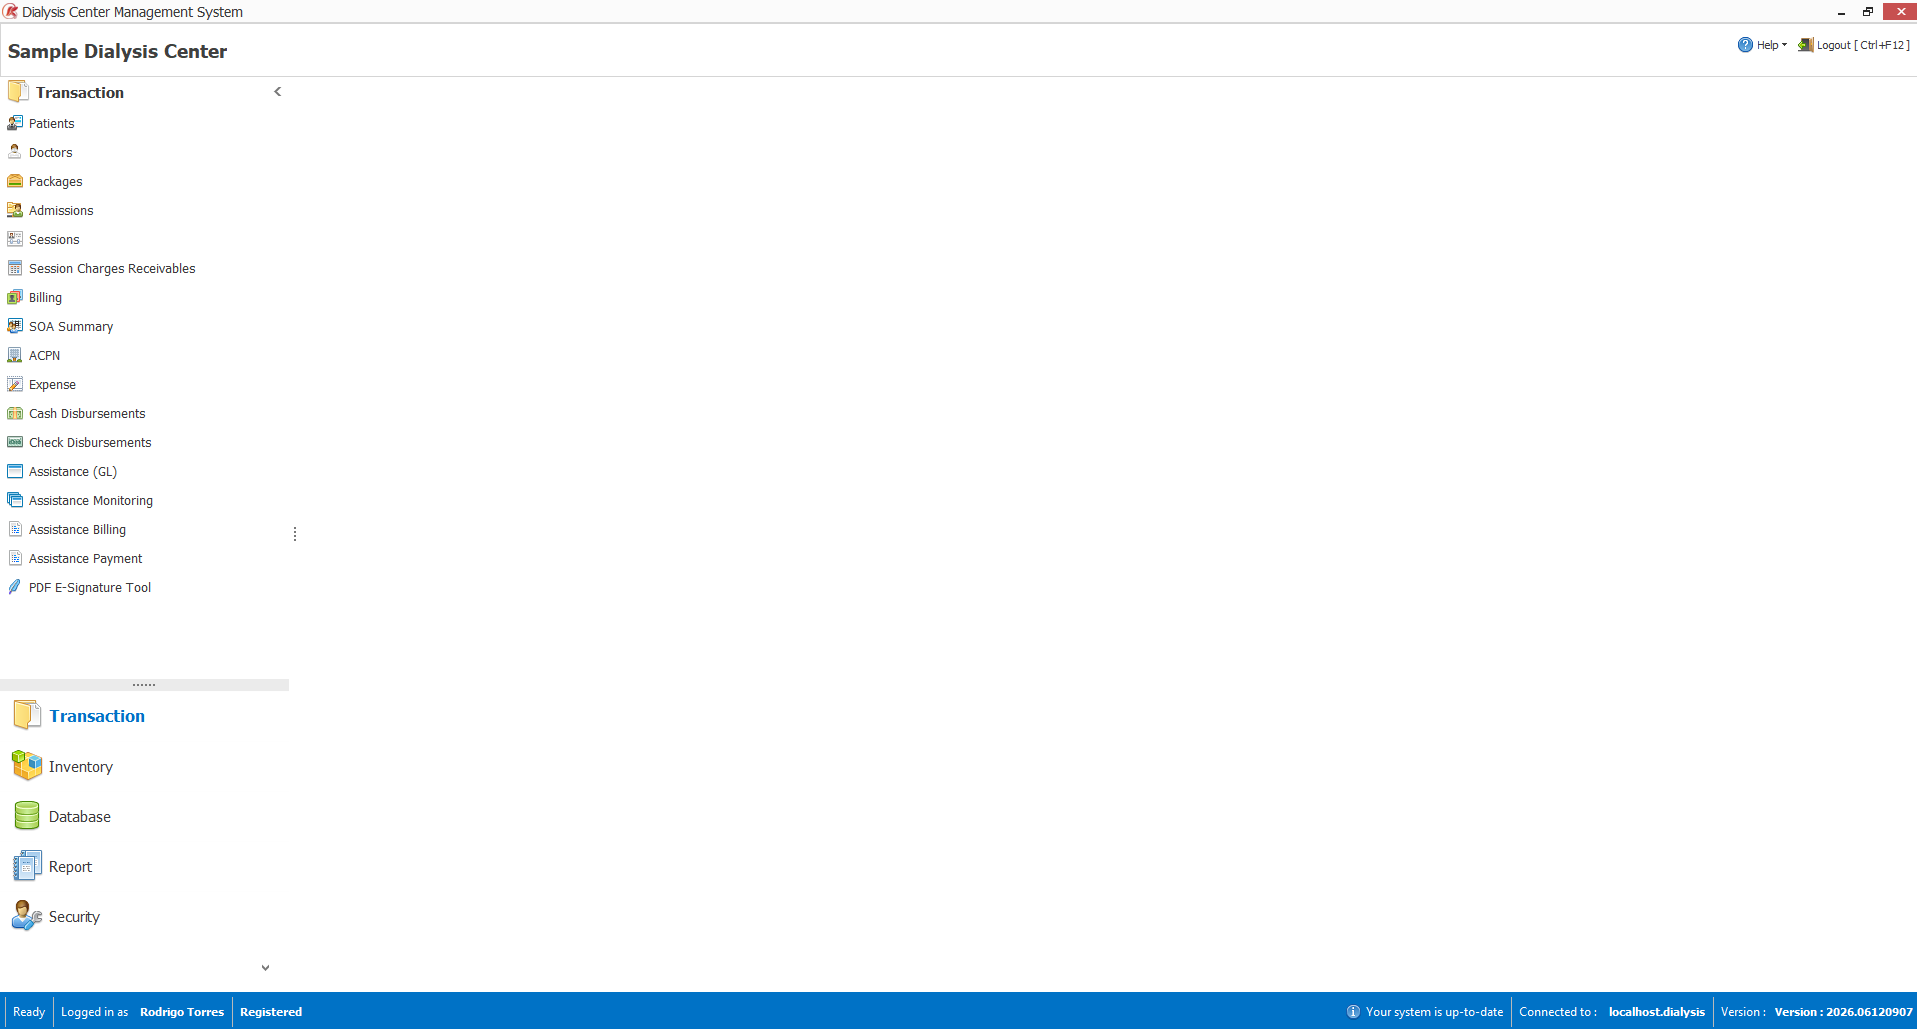
One menuEvery module in one place, from patients to reports. - You do
-
2
Patient intake
Register & admit the patient
A patient arrives for treatment; you create their record once.
- You do
Register the patient — personal details, PhilHealth membership, contacts and attending physician — then open an admission.
- The system
Auto-numbers the admission (year plus a running sequence), allows only one active admission per patient, and carries the PhilHealth details into every later form.
- You get
A clean patient record and an open confinement, ready for sessions.
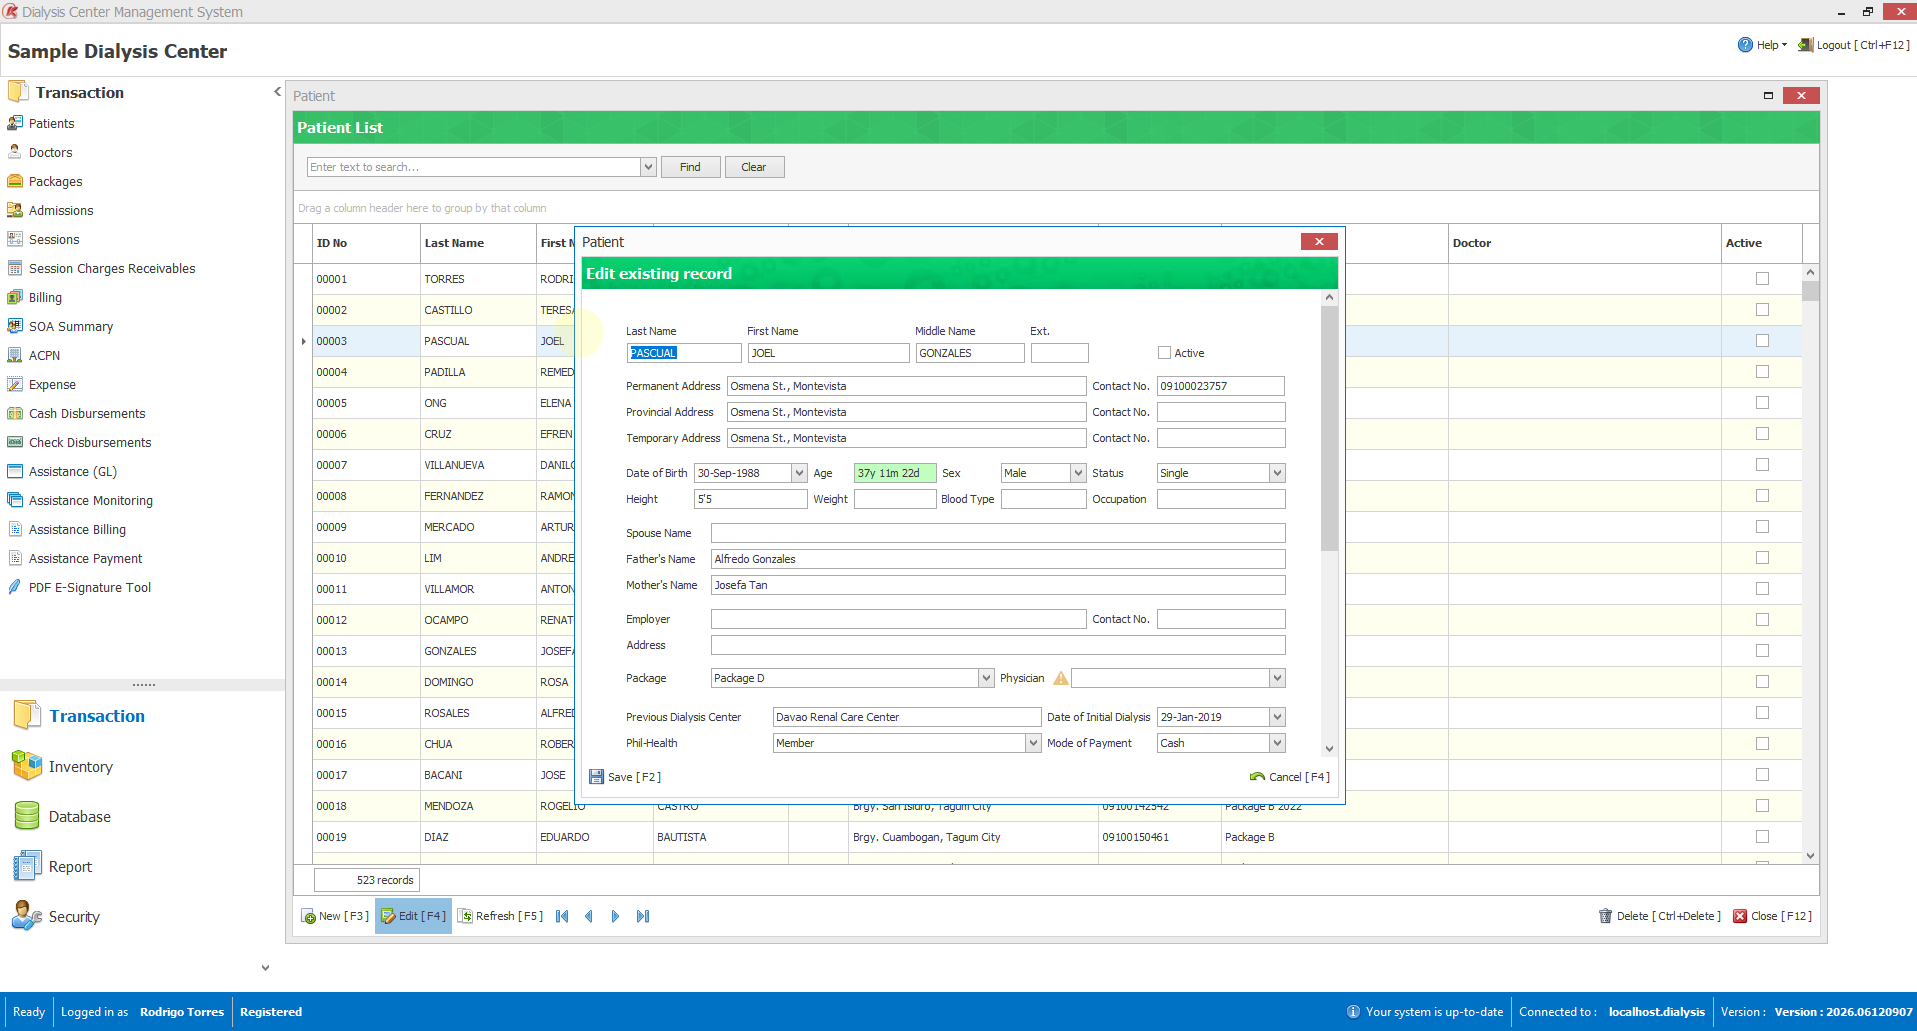
Patient recordDemographics, PhilHealth membership, contacts and physicians. - You do
-
3
Treatment
Run each dialysis session
For every session, you log the treatment and its charges — the raw material for the bill.
- You do
Create the session, set the time on and off, and confirm the itemized charges. Fill the Annex A checklist for the session.
- The system
Auto-loads your default charge items at your set prices, totals them live, and tracks the session from Active to Complete.
- You get
A complete, itemized record of every session — nothing to re-type at billing time.
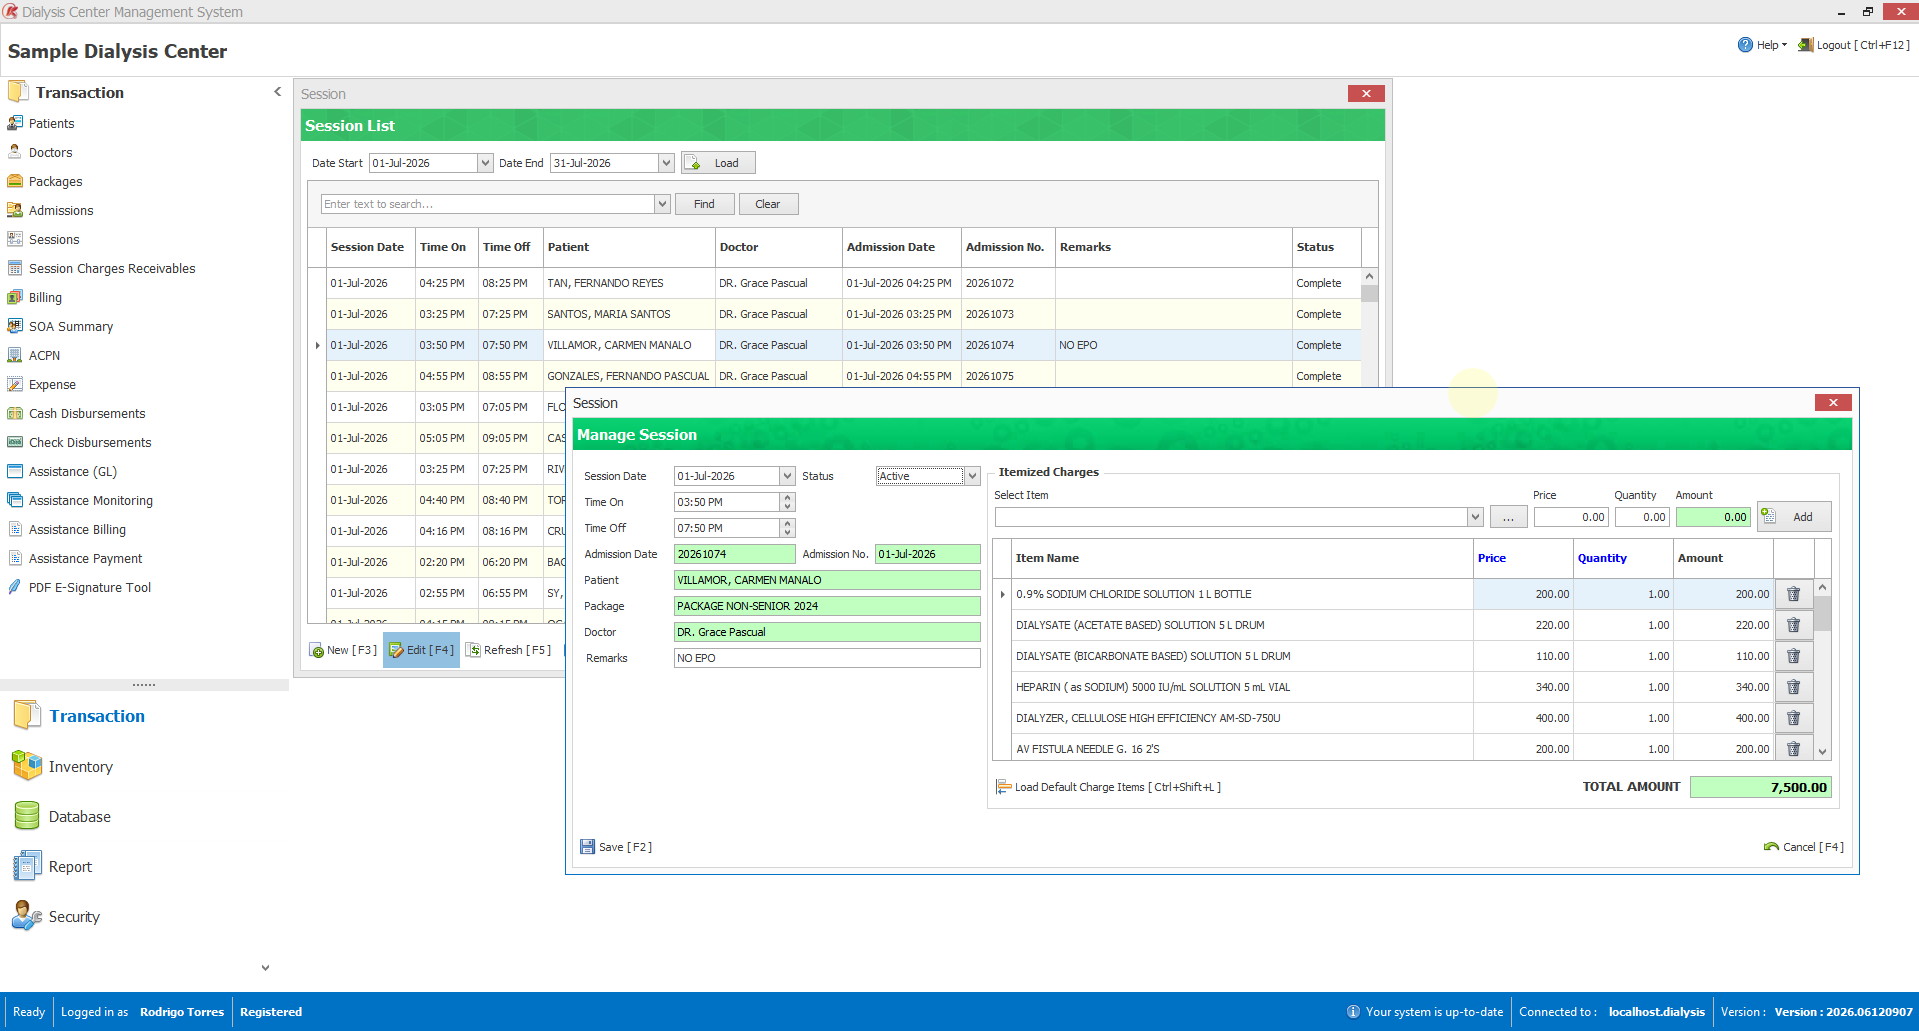
Session chargesEach treatment with its itemized charges and running total. - You do
-
4
End of confinement
Discharge
When the confinement ends, you close it out.
- You do
Set the discharge date — the system offers the last session’s time — and close the admission.
- The system
Groups all the completed sessions under that confinement and won’t let you discharge while a session is still open.
- You get
A finished confinement, waiting in the billing list.
- You do
-
5
Statement of Account
Bill to PhilHealth
This is where the system saves the most time — turning a month of sessions into a compliant claim, with the maths done for you.
- You do
Pick the discharged confinement and generate its billing. Set the claim number when it’s filed.
- The system
Computes the SOA per session — bucketing charges into room, drugs, laboratory, operating room and supplies; spreading the PhilHealth benefit and mandatory discounts across them; scaling professional fees by the number of sessions; and arriving at the amount due. Then it prints the forms with the hemodialysis codes (ICD-10 N18.5, RVS 90935) already filled in.
- You get
A printed SOA, CSF, Annex A and CF-2 ready to file — plus a claim number and status you track in the SOA Summary.
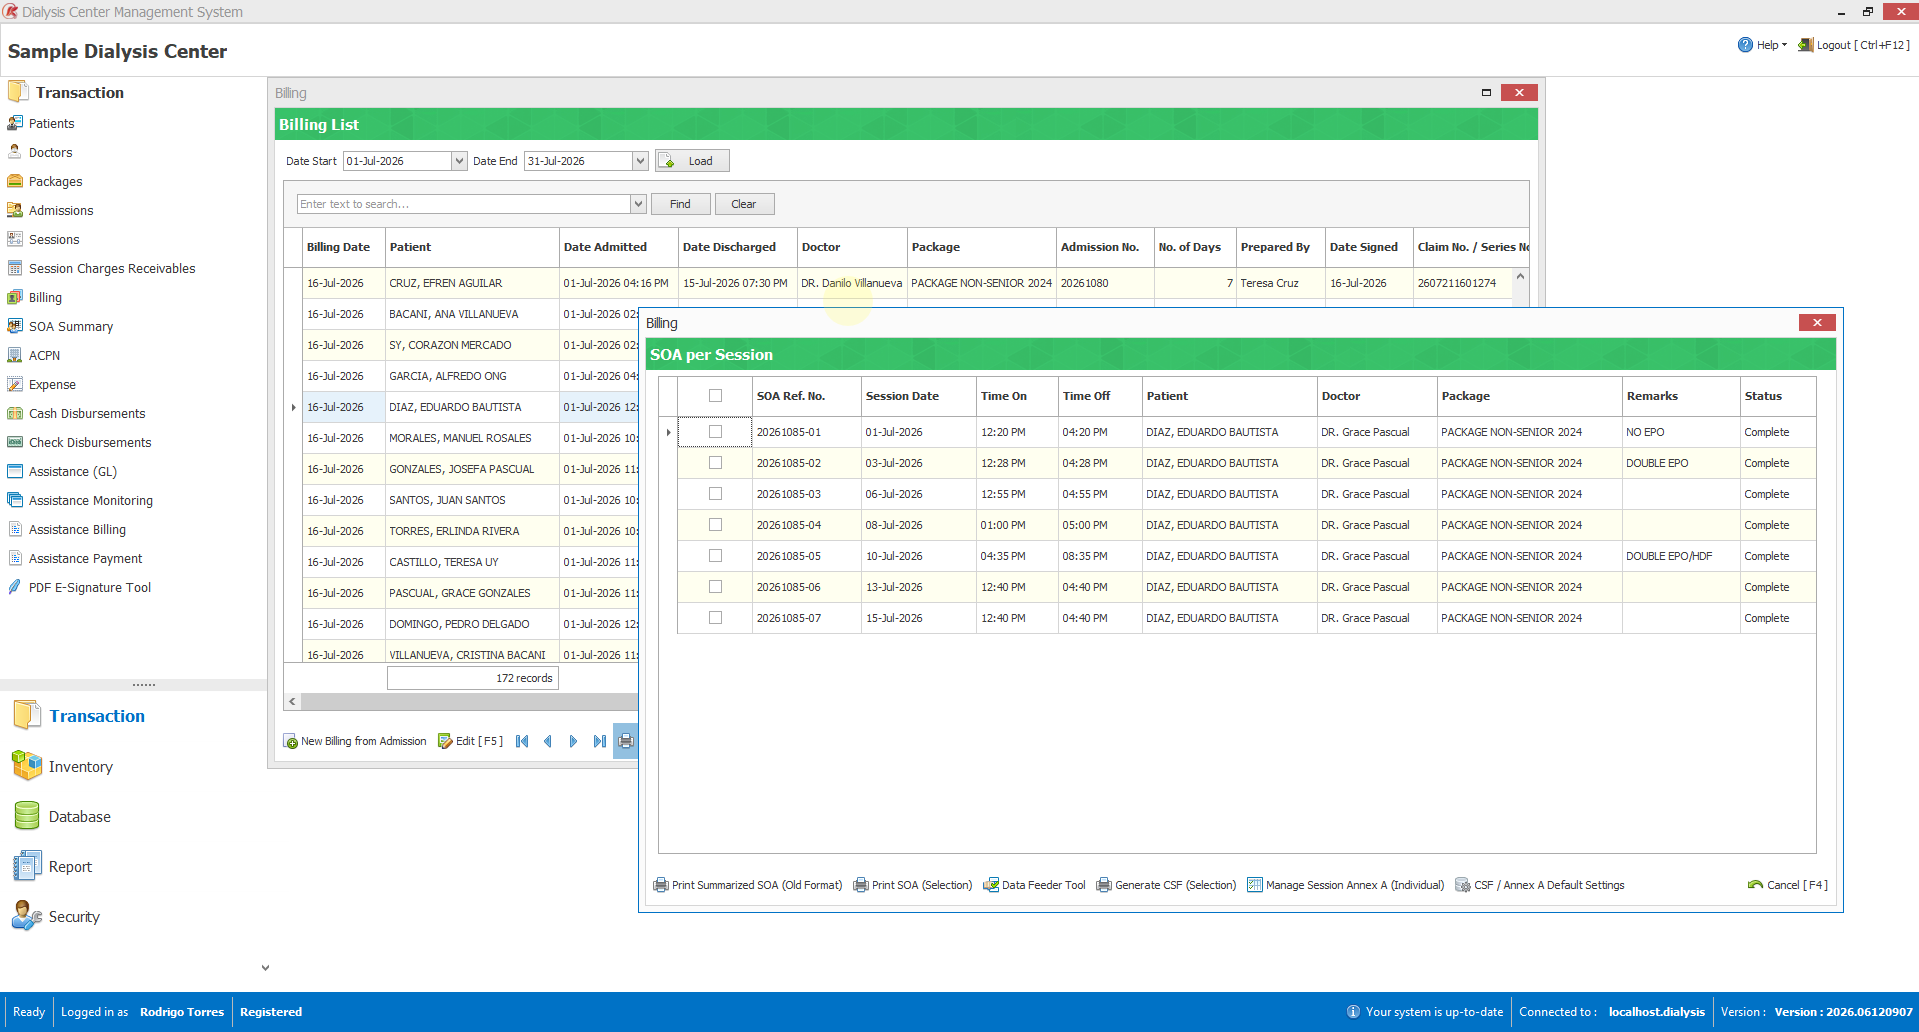
Per-session billingConfinements ready to bill, forms a click away. 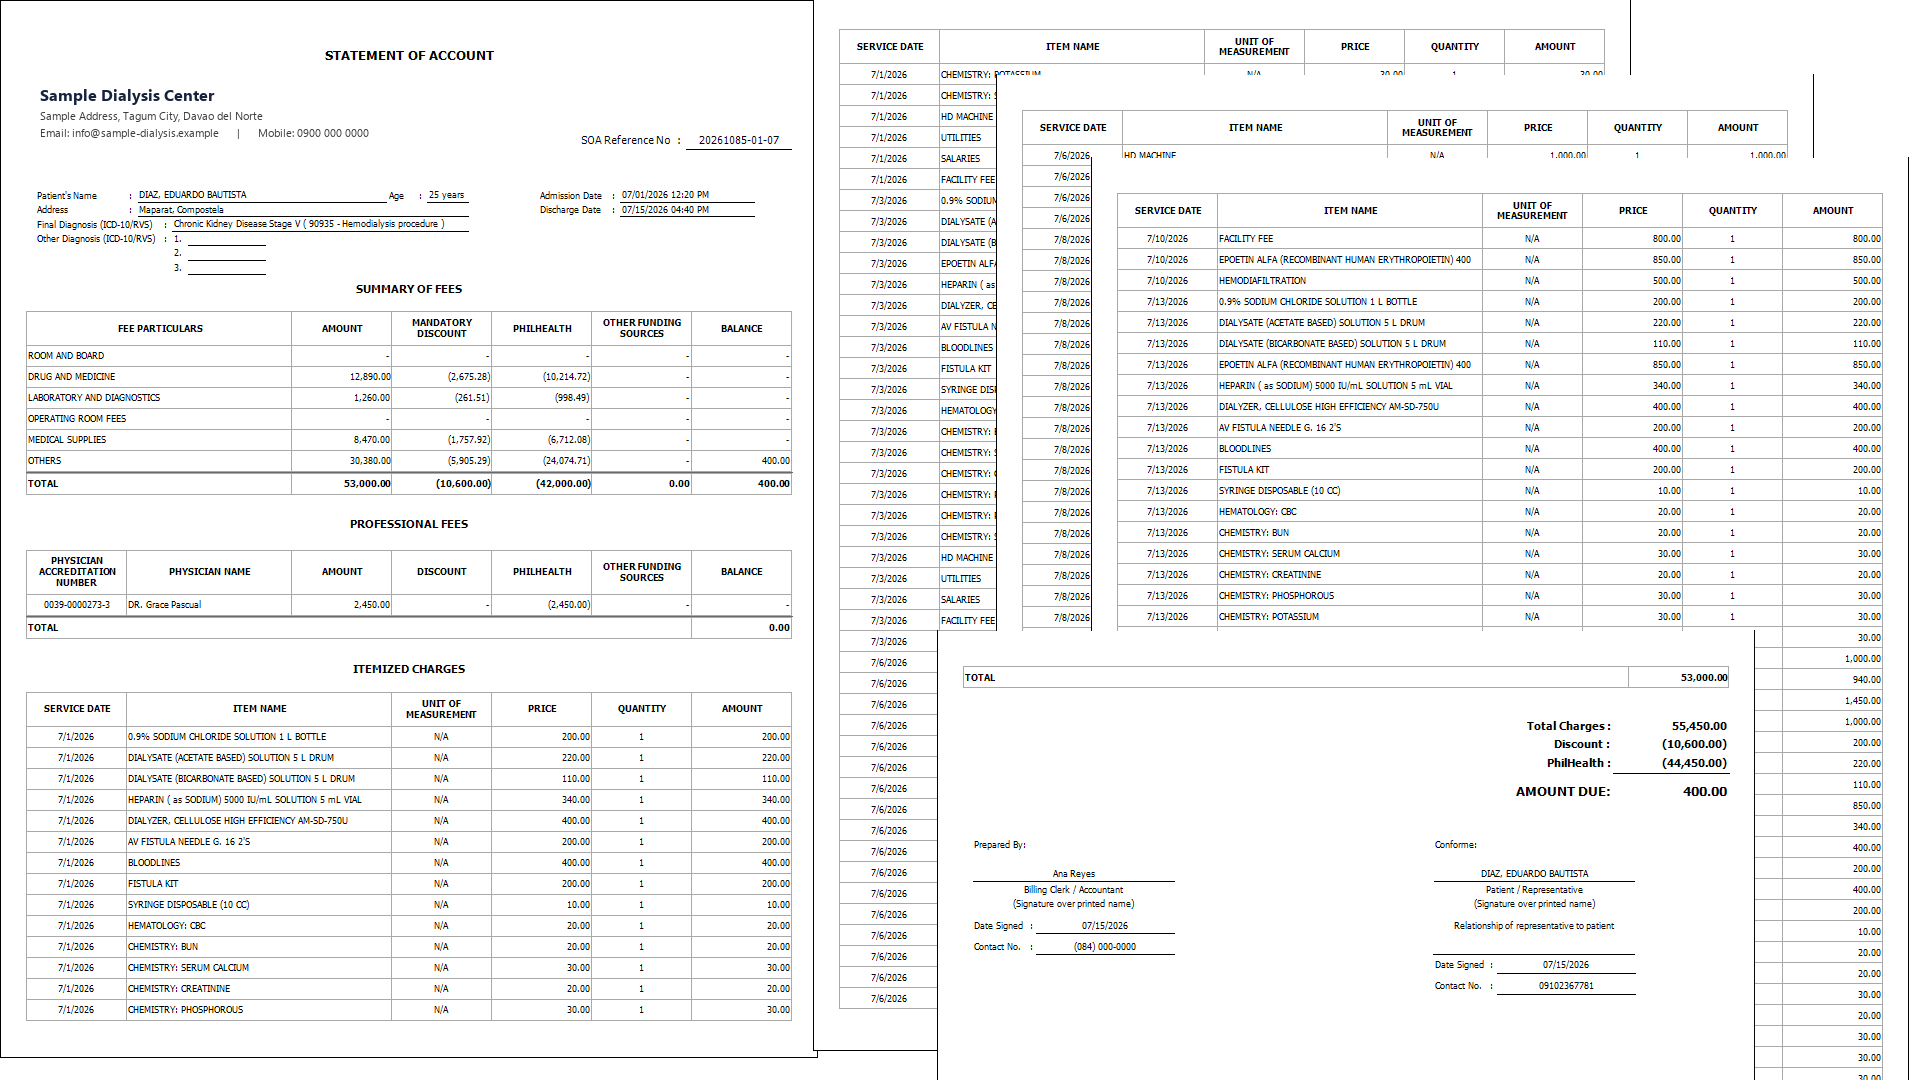
Printed SOAThe Statement of Account, exactly as it prints. - You do
-
6
Reimbursement & payout
Get reimbursed & pay your doctors
When PhilHealth pays, you record the claims and the system turns them into your doctors’ fee vouchers.
- You do
Enter each ACPN claim — the AVP number, gross and EVAT — then generate a fee voucher for each doctor.
- The system
Fills in the physician from the patient and computes the net as you record each claim. At payout it gathers a doctor’s unpaid claims, computes each fee and the withholding tax, prints the check voucher, and marks those claims paid.
- You get
Doctors paid accurately from the recorded claims, with the voucher paperwork done for you.
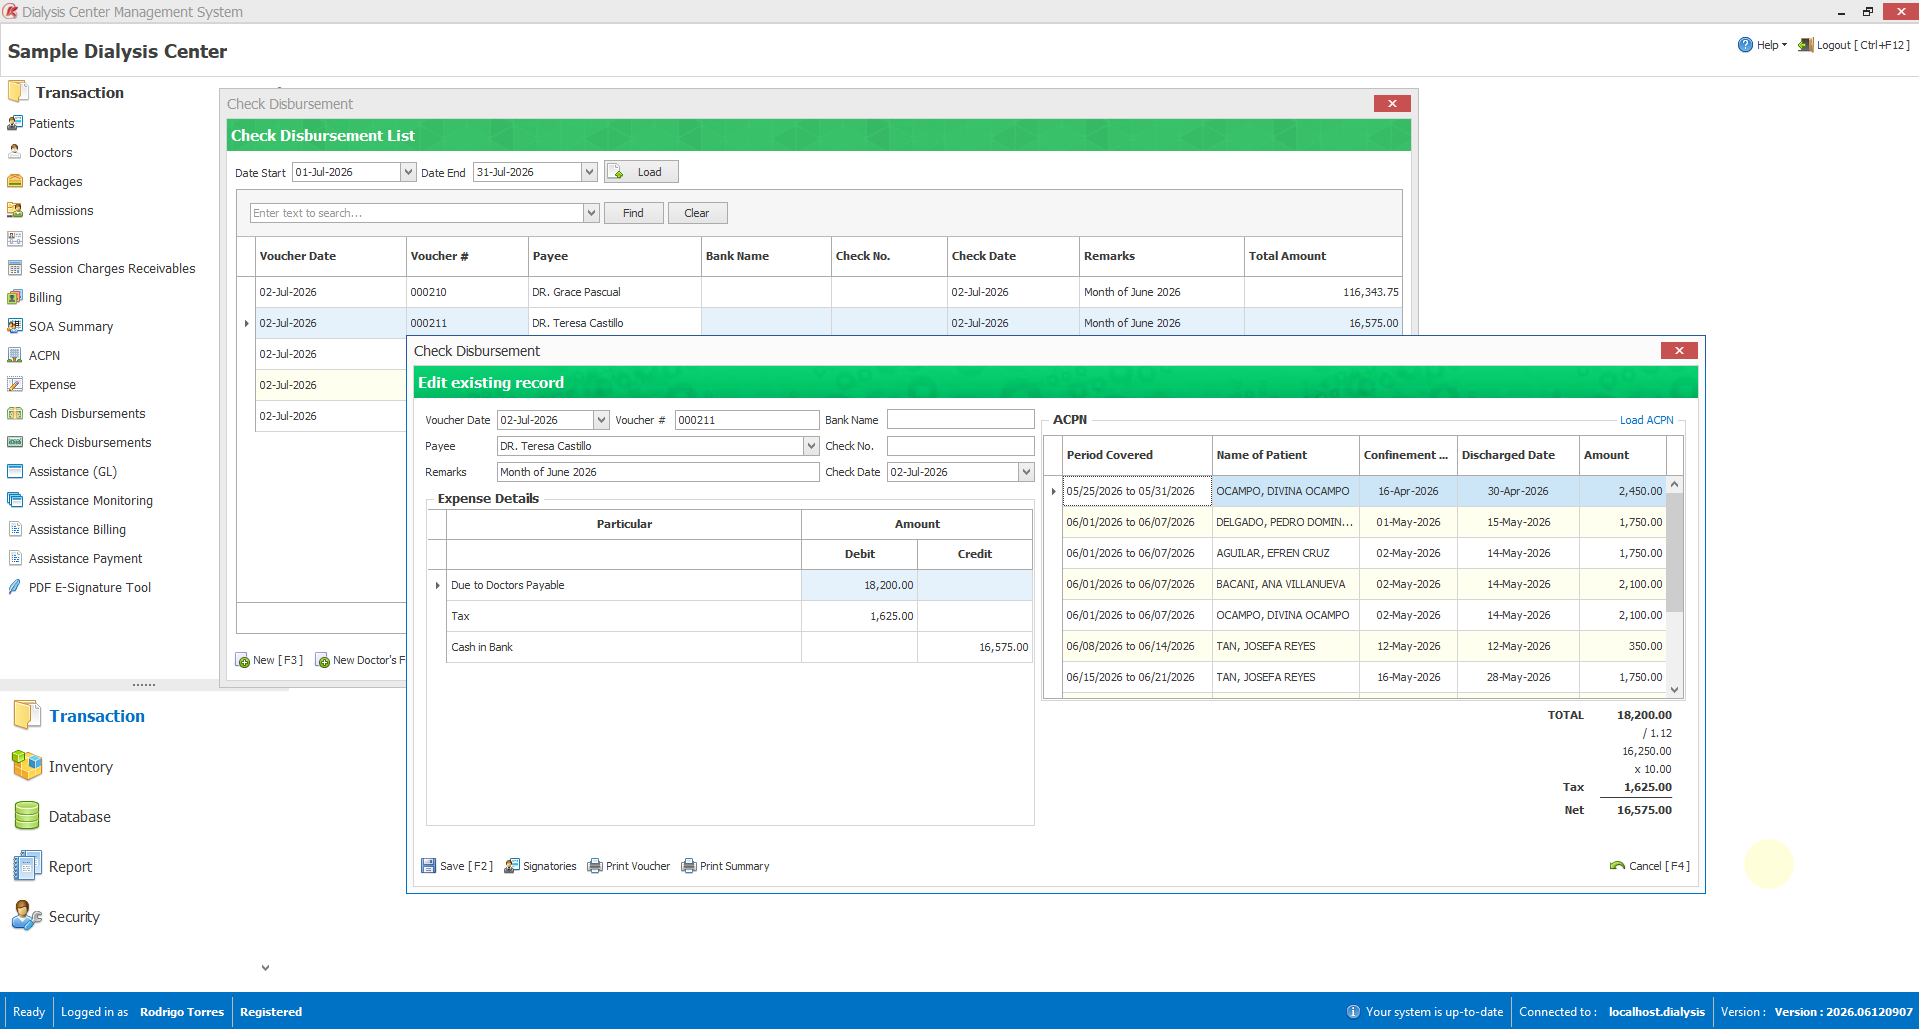
Doctors’ fee voucherA check voucher computed from the doctor’s claims. - You do
-
7
Assistance — a parallel track
Track sponsors & guarantee letters
For patients backed by a sponsor — PCSO, a Malasakit program, an LGU — the system runs a second financial track alongside PhilHealth.
- You do
Record each guarantee letter, bill the sponsor, and log payments as they arrive.
- The system
Tracks each letter’s amount received and used, keeps one active per patient with an expiry, applies withholding tax, and maintains a running-balance ledger per sponsor.
- You get
A clear picture of what each sponsor owes and has paid — so assistance funds are never quietly lost.
- You do
-
8
Oversight
Oversee, report & protect
Around the whole flow, the system keeps you in control.
- You do
Choose what each staff member can see and do, run your reports, and back up your data.
- The system
Enforces 150+ per-user permissions with a supervisor override, produces reports and a dashboard, and backs up the whole database to an encrypted file.
- You get
Oversight, accountability and a safety net — the clinic keeps running smoothly.
- You do
That’s the whole loop
See it run on a month of your own workflow.
In a short demo we’ll walk this exact flow on sample data — record sessions, compute an SOA, print the PhilHealth forms and prepare a doctor’s fee voucher.